- Copy the folder Lab13 from the public folder on the I: drive to your class folder on the I: drive.
- Start up Dreamweaver (from the Start menu, Programming Languages)
- Today you will add a few web pages to a web site. The
purpose is help you gain insights, not to become an expert web
author.
Overview The web authoring tool you will use is Macromedia's Dreamweaver. You will 1) set up a Dreamweaver web page authoring environment, 2) author a few simple web pages, and 3) embed Java applications in web pages as applets.
Setup You will need to set up local and remote sites (folders) for your web site. The local folder will be the Lab13 folder that you copied to your I: drive folder. The remote folder will be the web site folder where the pages you put into production will reside.
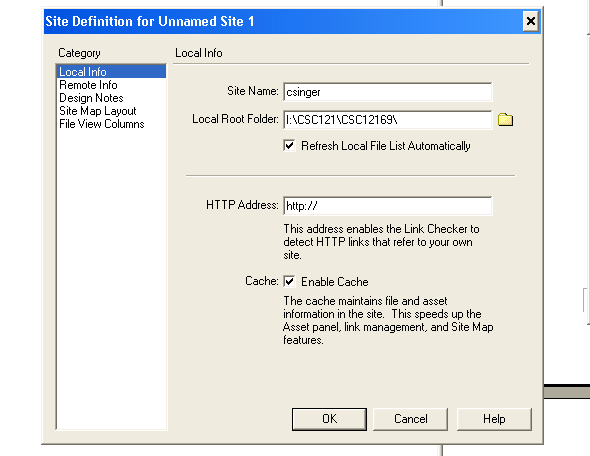
- Set up a local folder - click on Site/New Site in the menu bar. Give the local site the same name as your username (see the first image below). Click OK when ready for the next step.
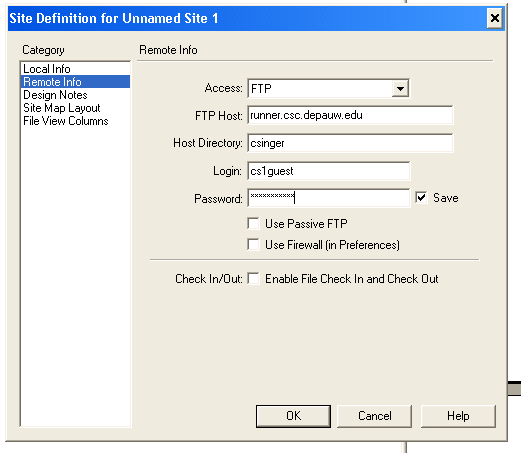
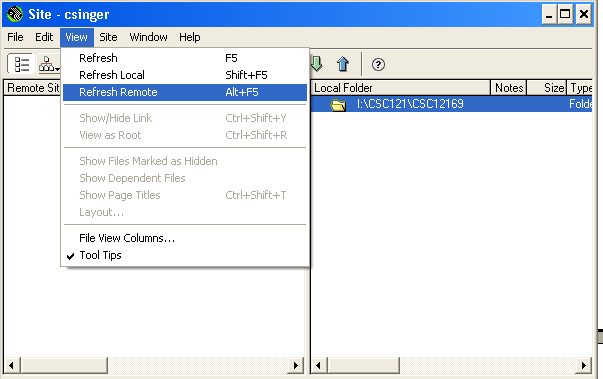
- Set up a remote folder - this folder is where your production web pages will be. The server is a Microsoft Windows 2000 server called runner.csc.depauw.edu/csc121. You have been assigned a folder there named with your username. After clicking on Remote info, you will see a window like the second image below. Fill it in as below, substituting your username folder for csinger. For password, enter cs1spring2005. When finished, click OK. To see both local and remote folders, click on refresh remote in the site window (see the third window below).
You are now set up to author web pages.
- Creating a web page
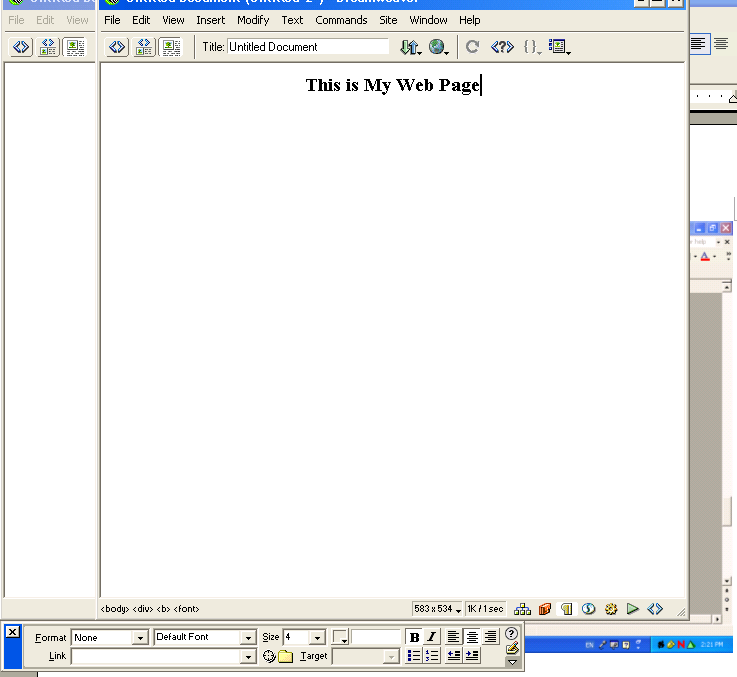
Create Click on File/New in a Dreamweaver window to create a new and empty web page. You can author a web page similar to using a word processor such as MS Word. In the figure below that there is a small "properties" window at the bottom that can be used to format the text being typed or any selected text. Note that the text has been sized to 4, bolded and centered. Note also that if you wanted this text to be a hyperlink (a clickable link to another web page), you could browse and select the linked-to page all within the properties window. Play a bit and create a web page with a few different kinds of things on it. When you are ready you should upload this page to the web server. First save the page, giving it a name like, mypage.htm. Next, select the page in the local view by clicking on it, then click on the fat up-arrow in the tool bar below the main window. This will copy the file from your local folder to the web folder. You may answer either yes or no to the question, Copy dependent files.
Now go to the page you created by launching Internet Explorer and entering the url:
http://runner.csc.depauw.edu/csc121/<your folder name>/<your page name>.htm
The process of creating a web site is similar to writing a program. For each page in the site, you develop it locally, see how it looks in a browser, and keep editing-viewing until the page looks the way you want for the world to view it.
- Creating a small applet based web site.
Transfer Copy the entire local site to the production site. Click on the top folder in the local view and then click the fat up arrow. Respond yes, to transfer the entire site.
Do Create three web pages, calculator.htm, graphic.htm, and simple.htm. Pattern each of these after shuttle.htm but change the applet tag information accordingly... calculator.class and .../csc121/<your username>/calculator, and so on. "Put" these pages to the remote site when you finish creating them.
Modify Create or modify the following applets accordingly (don't forget that you can test the applet in BlueJ before uploading it to the web site):
- In BlueJ, modify the Calculator class in the calculator project so that it is an applet. Use your notes from class to do this. Once complete, upload Calculator.class. Test the applet by browsing to the calculator.htm page and seeing that the calculator you wrote in project 2 earlier this semester runs from Internet Explorer.
- In BlueJ, modify the Graphic class in the graphic project so that it will display a circle (g1.fill) surrounded by a rectangle (g1.draw). Once complete, upload Graphic.class and test in Internet Explorer as above.
- In BlueJ, create a new (applet) class called Simple in the simple project. This class is similar to Graphic. Have the applet display some formatted text and at least one figure, both different from the Gui applet. As above, transfer Simple.class to the web site and view it in Internet Explorer.
Edit Finally, edit the web page lab13.htm, so that it has a link to each of the three web pages you just completed. Mimic the link to Shuttle, already in that page. Now browse your site to make sure all the links and all the applets are working.